


Meaning, at a glance: in wet rooms, “micro‑textured” describes a surface engineered with ultra‑fine relief you can just feel, designed to boost grip without feeling gritty. If you’ve seen tiles or shower bases that look smooth yet feel secure under bare feet, that’s it.
Curious about the meaning: micro-textured surface in the bathroom and how it changes day‑to‑day comfort? In this 2026 guide, you’ll learn what it is, how it improves safety, how it cleans, and how to specify it for showers, floors, and walls—step by step.
Grip without grit: definition
In a bath space, micro‑texture means a subtle surface relief engineered at a very small scale. It creates friction with skin when water, soap, or shampoo reduce traction, while keeping a soft, almost satin feel.
- How it works: tiny peaks and valleys interrupt water films, improving wet traction underfoot.
- Where you feel it: shower trays, porcelain tiles, microcement floors, and even wall finishes near splash zones.
- Why it matters: reduces slip risk without the scratchiness of coarse textures.
- Design benefit: preserves smooth, continuous lines in a minimalist washroom.
A micro‑relief can raise perceived grip while maintaining a matte, light‑diffusing finish for calm bathroom lighting.
Unlike visibly rough tiles, micro‑textured finishes keep cleaning straightforward. You gain slip resistance and keep the easy‑wipe qualities of a smooth shower surface.

Confident footing in wet zones
Slip resistance in a shower or around a tub relies on texture scale, pattern, and finish. Aim for reliable grip in soapy water while keeping a pleasant barefoot feel.
- Ratings to know: look for DCOF ≥ 0.42 (wet) or European ramp classes around R10–R11 for domestic bathrooms.
- Dense porcelain and micro‑textured glazes offer “invisible safety” without aggressive grain.
- Mosaics add grout lines that increase traction on slopes to the drain.
- Microcement can be finished with a fine, anti‑slip trowel grain or sealed topcoat with subtle tooth.
Match slip ratings to zone use. Inside the shower needs higher traction than a vanity walkway.
For aging‑in‑place and rehab needs, pair micro‑textured floors with targeted accessories in the stall or outside it. A senior‑friendly non‑slip mat can complement built‑in micro‑relief on days when stability matters most.
Plan slope consistency, drain placement, and floor format. Small tiles follow curves to floor wastes; large slabs reduce joints but need precise falls to avoid pooling.
Cleaning and hygiene made simple
In a moisture‑rich washroom, micro‑textures must stay easy to wipe. The goal is micro‑smoothness where you clean and micro‑relief where you step.
- Prefer matte or satin glazes with micro‑relief: they scatter light and hide marks, yet release limescale with standard cleaners.
- Reduce grout in splash zones. Seamless microcement or large porcelain formats minimize dirt traps.
- Avoid harsh abrasives that can round off fine textures and reduce traction over time.
- Weekly routine: pH‑neutral detergent, soft pad, rinse, then squeegee glass and trays to limit film build‑up.
Target joints: a narrow grout float and quality sealer reduce water ingress and make scrubbing faster.
Micro‑textured trays and tiles often show a fine, regular pattern. That geometry helps break the water film; it also means a soft brush lifts residue quickly after a rinse.
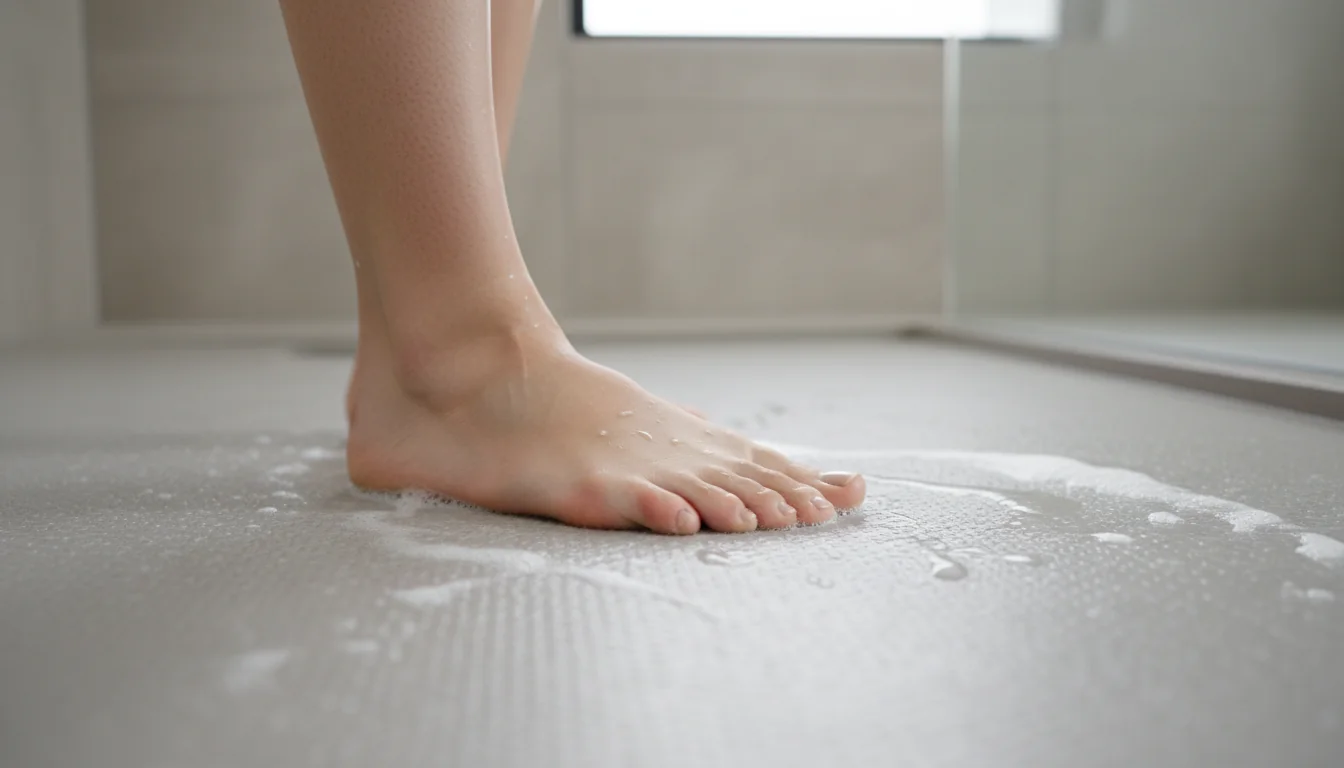
Materials that thrive in humidity
From porcelain to microcement and molded bases, the best bathroom materials combine low absorption, micro‑relief, and stable sealers.
- Porcelain tiles: dense body, micro‑textured glazes, excellent for showers and floors.
- Microcement: seamless, thin overlay; apply appropriate waterproofing and a matte sealer with subtle tooth.
- Acrylic or solid‑surface pans: molded micro‑texture gives tactile grip and easy cleaning.
- Painted walls: use moisture‑resistant formulations; keep finishes matte to diffuse light and mask micro‑stipple.
| Finish type | Best use in wet areas |
|---|---|
| Matte porcelain, micro‑relief | Shower floors; family bathrooms needing balance of grip and easy cleaning |
| Honed stone‑look porcelain | Main floors; combine with bath mats at exits for added safety |
| Microcement, matte sealer | Walk‑in showers, vanities, niche walls; seamless look with controlled traction |
| Molded base, fine texture | Fast‑fit shower trays; reliable grip and straightforward upkeep |
Choose materials that can resist humidity and specify micro‑textures where feet land and water lingers.
For painted ceilings or feature walls near the bath, select a roller nap that suits the substrate: ~3/8‑inch for smooth drywall, up to 1/2‑inch on lightly textured areas to maintain uniform film without burying fine relief.
Calm light, tactile design cues
Micro‑textures shape how light behaves in a compact washroom. A gentle relief adds soft shadow and reduces glare, ideal for serene, spa‑like schemes.
- Use warm neutrals and matte, micro‑structured tiles to enhance depth without noise.
- Large formats reduce joints; “low cladding” up to tap height frees upper walls for paint.
- In a walk‑in shower, keep the tray and wall finish consistent for a seamless look.
- Pair micro‑textured floors with honed wall panels for a quiet contrast you can feel.
Test samples where they’ll live. Micro‑relief and color shift under real bathroom lighting.
In 2026, the most convincing “invisible safety” pairs refined, cement‑like textures with porcelain or microcement for continuity from floor to niche.

Retrofit advice for renovations
Updating a bath doesn’t have to mean demolition. Many systems allow overlaying existing tile and introducing micro‑textured finishes with minimal disruption.
- Over‑tile options: thin overlays (e.g., microcement) can bond to sound substrates with the right primer and mesh in wet zones.
- Seal strategy: choose matte sealers that preserve micro‑relief while resisting stains.
- Thresholds: ensure level transitions at shower entries to avoid trip points.
- Maintenance plan: set a simple cleaning schedule to keep micro‑textures performing.
Allow proper curing time—72 hours is a common minimum before sealing newly applied finishes.
If you’re planning a walk‑in, review a Walk‑In Shower Guide: Everything You Need to Know Before Designing Your wet room so micro‑texture, drainage, and doorless entries work together.
How to specify micro‑texture: quick guide
- Define zones: inside shower, drying area, vanity path.
- Set performance: pick slip targets (e.g., DCOF, R‑class) by zone.
- Choose material: porcelain, microcement, or molded base with micro‑relief.
- Balance cleaning: minimize joints in splash areas; seal grout properly.
- Mock‑up: wet‑test samples barefoot before final purchase.
Edge details matter. Soften corners and use silicone at changes of plane to keep water out of joints.
For small stalls, a compact accessory helps at entry points—see small square shower mat sized for typical shower footprints.
What does “micro‑textured” mean in a washroom?
It’s a fine, engineered relief that increases friction when wet. You feel secure underfoot without the scratchy feel of heavy textures. It suits showers, floors, and splash‑zone walls.
How does it compare to smooth or rough finishes?
Smooth is easy to wipe but less grippy when soapy. Rough grips well but can trap dirt. Micro‑texture balances both. For more coverage at entries, consider grey shower mat in larger stalls.
What are the key advantages in the bathroom?
Better wet traction, a calm matte look, and straightforward cleaning. It enables seamless design—especially with large porcelain or microcement—while staying safe underfoot.
Is micro‑texture suitable for family or guest showers?
Yes. Aim for DCOF ≥ 0.42 or R10–R11. It’s comfortable for kids and guests, and it pairs well with bath mats to reinforce safety at exits and drying areas.
How do I clean micro‑textured surfaces?
Use pH‑neutral cleaner, soft brush, rinse, and squeegee. Seal grout. Outside the stall, bath mat keeps floors drier and reduces residue.
Can I add micro‑texture without replacing tiles?
In some cases, yes: thin overlays like microcement or specialist coatings work over sound substrates. Always verify waterproofing, sealer choice, and curing times before use.
Micro‑textured surfaces bring quiet confidence to the bathroom: safer steps, softer light, and simple maintenance—exactly what a daily routine needs in 2026.
- Prioritize zones: highest traction inside showers and at exits.
- Balance grip and cleaning with fine relief and sealed joints; try a pebble‑texture mat where extra hold feels reassuring.
- Match materials to humidity: porcelain, microcement, or molded bases with matte micro‑relief.
Treat safety as part of good design, and your wet room will look and feel right—day after day.

0 comments